start => aplicaciones
Internet
¿Cómo instalar el plugin de Flash para Mozilla Firefox?
$ sudo aptitude install flashplayer-mozilla
$ sudo aptitude install msttcorefonts
$ sudo ln -s /usr/lib/libesd.so.0 /usr/lib/libesd.so.1
# which /dev/dsp wrapper to use
#FIREFOX_DSP="auto"
FIREFOX_DSP="aesd"
¿Cómo instalar el plugin de Adobe Acrobat Reader para Mozilla Firefox?
$ sudo aptitude install mozilla-acroread
¿Cómo instalar el plugin de Java para Mozilla Firefox?
¿Comó dar soporte para el protocolo ED2K a Mozilla Firefox?
about:config
network.protocol-handler.external.ed2k
network.protocol-handler.app.ed2k
/usr/bin/ed2k
— Adrián Pérez 2005/08/24 12:04
¿Cómo instalar el navegador web Opera?
$ sudo dpkg -i opera<Tecla Tab>
tecla Tabulación
$ sudo apt-get -f install
$ sudo gedit /usr/share/applications/opera.desktop
[Desktop Entry]
Encoding=UTF-8
Name=Navegador Web Opera
GenericName=Navegador Web
Comment=Fácil, la mejor experiencia en Internet
Exec=opera %u
Terminal=false
MultipleArgs=true
Type=Application
Icon=/usr/X11R6/include/X11/bitmaps/opera.xpm
Categories=Application;Network
MimeType=text/html;image/gif;image/jpeg;image/png
$ mkdir ~/.opera
$ gedit ~/.opera/filehandler.ini
Opera Preferences version 2.0
; Do not edit this file while Opera is running
; This file is stored in UTF-8 encoding
[Settings]
Default File Handler=gnome-open ,1
Default Directory Handler=gnome-open ,1
— Gabriel Molina 2005/12/26 15:29
¿Cómo instalar Internet Explorer?
-
-
En muchas ocasiones, sobre todo si estamos desarrollando aplicaciones o páginas web, puede ser necesario probar la compatibilidad entre los distintos navegadores. Si no quieres recurrir a un emulador, o reiniciar el equipo, puede ser muy útil tener Internet Explorer funcionando en Ubuntu.
$ sudo aptitude install wine cabextract
$ tar xzvf ies4linux-1.1.0.tar.gz
$ cd ies4linux
$ ./ies4linux
$ ~/bin/ie6
— Aitor Calero García lunes, 07 de noviembre de 2005
¿Cómo instalar el nuevo Firefox 1.5?
De forma manual
En la siguiente página te cuenta cómo instalar la nueva versión de Firefox de forma muy correcta:
Instalar Firefox 1.5.
Usando un repositorio
deb http://gatoloko.gsol.ws/repositorio breezy estable
$ sudo aptitude install firefox
¿Cómo instalar el lector de noticias (Pan)?
$ sudo aptitude install pan
¿Cómo instalar el lector de sindicaciones (RSS) Liferea?
$ sudo aptitude install liferea
— Paco Avila 2005/04/09 05:22
¿Cómo instalar el lector de sindicaciones (RSS) Imendo Blam?
$ sudo aptitude install blam
¿Cómo instalar el cliente BitTorrent Azureus?
$ sudo aptitude install azureus
¿Cómo instalar el Cliente Gnutella LimeWire)?
$ cd ve_a_tu_carpeta_de_descargas
$ sudo unzip LimeWireOther.zip -d /opt/
$ sudo chown -R root:root /opt/LimeWire/
$ sudo gedit /usr/bin/runLime.sh
cd /opt/LimeWire/
./runLime.sh
$ sudo chmod +x /usr/bin/runLime.sh
Menu Editor
Name: LimeWire
Command: runLime.sh
Icon: /opt/LimeWire/LimeWire.ico
Category: Internet
—
Pulsa Guardar
¿Cómo instalar el cliente Donkey (aMule)?
$ sudo aptitude install amule
¿Cómo estar a la última con aMule?
deb http://koti.mbnet.fi/~ots/ubuntu/ breezy/
deb-src http://koti.mbnet.fi/~ots/ubuntu/ breezy/
# gpg --keyserver hkp://wwwkeys.eu.pgp.net --recv-keys 70188C3B
# gpg --armor --export 70188C3B | sudo apt-key add -
¿Cómo instalar el cliente multiprotocolo MLDonkey?
$ sudo aptitude install mldonkey-server
Este cliente tiene un par de particularidades respecto a aMule: trabaja como un demonio y es capaz de conectarse a varias redes
P2P (BitTorrent, Donkey, FileTP, Gnutella, G2).
La aplicación se puede usar de varias formas: mediante un navegador conectándonos a
http://localhost:4080, mediante Telnet (para los muy machos) y usando un
GUI. El interfaz web es un poco cutre pero muy majo y puedes acceder a multitud de opciones. Lo normal es que los humanos mortales usen un cliente gráfico. De estos hay varios para elegir: hechos en GTK, para KDE, en Java... En los repositorio temos accesibles
kmldonkey para KDE y
mldonkey-gui para GNOME (La versión que viene con Breezy es un poco cutre, pero la de Dapper es más bonita.).
Pero de todos ellos a mi el que más me gusta es uno que se llama Sancho. Lo puedes encontrar en
http://sancho-gui.sourceforge.net/ y tiene versiones para Linux, Windows, OSX, Solaris, etc.
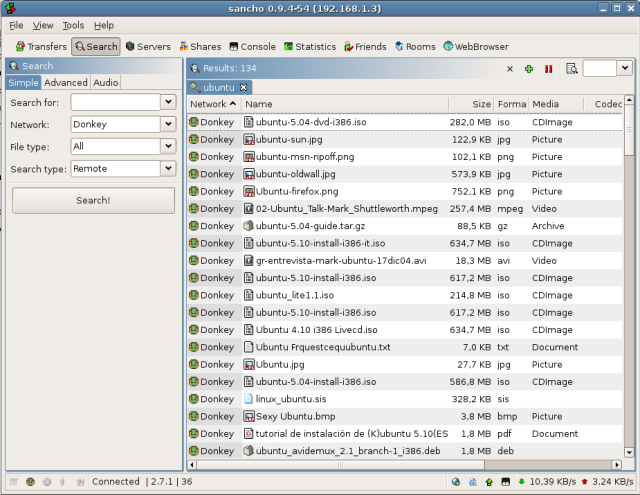
Pero qué ventajas tiene este cliente sobre aMule, por ejemplo. Pues puede correr en una máquina sin interfaz gráfico y controlarlo remotamente por web o usando un cliente como Sancho. Así puedes tener un servidor dedicado a las descargas y varios cliente en Windows y Linux que acceden al MLDonkey de este servidor. Yo, por ejemplo tengo un portátil siempre conectado que se encarga de estas tareas ya que consume poco y no hace tanto ruido como el PC.
Ajustes del programa
Pestaña Client:
max_hard_upload_rate = 5
max_hard_download_rate = 25
max_opened_connections = 100
max_concurrent_downloads = 25
Pestaña Ports:
allowed_ips = (Lista de IPs que tendrán acceso via
HTTP/Telnet/
GUI, separadas por espacios)
Pestaña Net:
Desplegable Donkey:
Integración con Firefox
¿Cómo instalar Apollon con librerías FastTrack(Kazaa) y Ares?
$ sudo gedit /etc/apt/sources.list
deb http://apt.cerkinfo.be/ unstable main contrib
deb-src http://apt.cerkinfo.be/ unstable main contrib
Guarda el fichero.
Actualizar repositorio.
$ sudo aptitude update
$ sudo aptitude install gift giftd apollon libgnutella-gift libopenft-gift libares-gift libfasttrack-gift libopennap-gift
$ gift-setup
Responder las preguntas, en la mayoría por defecto apretar Enter salvo las siguientes:
Escribir 1, después apretar Enter.
Boolean determining whether or not this file has been reviewed and is
complete.  giFT will fail to start unless this is non-zero.  This is done
so that we can make sure you, at the very least, read through this file.

Default: 0

/main/setup [0] 1
Colon separated list of protocol plugins to load by default.  If dynamic
library support is enabled, the plugin specified will be stat'd to check if
it is a loadable path.  If that fails, the fallback method is to attempt to
construct the fully qualified path based on the configured environment.

NOTES:
 Without dynamic library support, this plugin must have been compiled into
 your giFT binary.  With, this plugin must exist in the installed
 plugin directory.  giFT -V will output this path to you, if you are not
 sure.

 Protocol names are case sensitive, so use OpenFT, not Openft.

For example, to use the OpenFT and Gnutella protocols use:

 OpenFT:Gnutella

Default: none

/main/plugins [OpenFT] OpenFT:Gnutella:FastTrack:Ares:OpenNap
$ apollon
— Francisco Barrientos 2005/08/17 00:25
¿Cómo instalar eDonkey2000 (hybrid)?
$ sudo dpkg -i edonkeyclc_1.3.0-0_i386.deb
$ edonkeyclc
$ sudo dpkg -i ed2k-gtk-gui_0.6.4_i386.deb
—-
$ tar zxvf eDonkeyLinux1.1.tar.gz
$ cd eDonkey2000
$ ./edonkey2000
$ sh runDonkey.sh
— Alejandro Huguet Santana 2005/08/19 12:21
¿Cómo instalar Skype?
$ sudo apt-get install fakeroot alien
$ fakeroot alien --to-tgz skype_1.2.0.17-1_i386.deb
$ sudo apt-get install libqt3-mt
$ fakeroot alien --to-deb skype-1.2.0.17.tgz
$ sudo dpkg -i skype_1.2.0.17-2_all.deb
deb http://download.skype.com/linux/repos/debian/ stable non-free
$ sudo aptitude update
$ sudo aptitude install skype
— Gonzalo L. Campos Medina 2005/03/23 10:48
— Paco Avila 2005/07/15 01:28
¿Cómo instalar aMSN (cliente MSN Messenger) ?
$ sudo aptitude install amsn
$ sudo aptitude install tcl8.3 tk8.3
$ sudo gedit /usr/bin/amsn
cd /usr/share/amsn && /usr/bin/wish amsn
Sustituyela con la siguiente (salvo que pretendas usar la version
CVS, que necesita las versiones 8.4):
cd /usr/share/amsn && /usr/bin/wish8.3 amsn
— Alvaro Barranquero 2005/04/30 03:43
— Manuel Gomez 2005/06/20 23:48
— Benjamín Valero 2005/11/22 06:16
¿Cómo instalar el creador de bitácoras Wordpress?
$ mysql -u usuario -p
Enter password: clave
Welcome to the MySQL monitor. Comands end with ; or \g.
Your MySQL connection id is 4 to server version: 4.0.23_Debian-3ubuntu2-log

Type 'help;' or '\h' for help. Type '\c' to clear the buffer.

mysql> create database wordpress;
Query OK, 1 row affected (0.02 sec)
mysql> quit
Bye
$
Reemplazar usuario y clave por los correctos en tu sistema.
$ cd /var/www/html
$ tar zxf /directorio_de_descargas/wordpress-x.x.x.tar.gz
Por supuesto cambia los directorios en el caso de que sean distintos en tu sistema.
$ gedit wordpress/wp-config-sample-php
define ('DB_NAME', 'wordpress');
define ('DB_USER', 'usuario');
define ('DB_PASSWORD', 'clave');
define ('DB_HOST', 'localhost');
Introduce aquí los valores correctos para la Base de datos, usuario-clave, y nombre del servidor.
— Gabriel Molina 2005/05/18 15:13
¿Cómo instalar Jaws (blog)?
| Se asume la siguiente situación |
| Está instalado y funcionando el servidor web Apache con PHP y MySQL |
$ sudo mysqladmin -p create blog_jaws
Te pedirá el password que configuraste al instalar mysql
-
Descarga y descomprimie Jaws-project de
www.jaws.com.mx. Yo he bajado la versión 0.5.0.
$ tar -xvzf jaws-0.5.0.tar.gz
$ cd jaws-0.5.0
$ sudo mkdir /var/www/blog
$ sudo cp -R html/* /var/www/blog/
$ sudo chown -R www-data /var/www/blog/include
$ sudo chown -R www-data /var/www/blog/data
-
En el frame izquierdo donde dice “Bases de datos” aparece blog_jaws(-), seleccionalá.
Ahora en el frame central aparecen unas pestañas (arriba -estructura-sql-exportar-buscar-etc), dale click a la que dice
SQL.
Ahora busca en el centro abajo “Localización del archivo de texto:” le das click en el botón BROWSE y en el seleccionas el archivo (Se supone que tienes el directorio jaws-0.5.0 en /home/usuario/ ) /home/usuario/jaws-0.5.0/sql/MySQL.sql le das click en continuar y listo, le das EXIT o si no sabes donde está simplemente cierra la ventana del browser :D.
Introduction, le das NEXT
Autenticacion. Te dan un key, la seleccionas (solo lo del recuadro) y la copias al portapales
$sudo nano /var/www/blog/key.txt
//Con Shif+-insert la pegas y sales con Control+x y le dices que guarde los cambios//
Y le das otra vez NEXT
DATABASE: host: localhost usuario:root password:—- Database name: blog_jaws
Create a user: Ya tu veras lo que pones, y NEXT
Site settings : A tu gusto lo puedes acomodar, recuerda que el blog va a estar en
http://localhost/blog, y al final NEXT
Save configuration, NEXT
-
La idea es tener tu propio blog en tu computador sin importar si tienes una IP dinámica, te recomiendo que uses un servidor
DNS gratuito para que todos puedan ingresar.
Configurar No-ip
— Sebastián Ortiz 2005/04/26 14:50
¿Cómo instalar J2SE Runtime Environment (JRE)?
Versión 1.4 de Blackdown
$ sudo aptitude install j2re1.4
Versión 1.5 de Sun
deb http://ubuntu.tower-net.de/ubuntu/ breezy java
$ sudo aptitude update
$ sudo aptitude install sun-j2re1.5
— Sebastián Ortiz 2005/04/18 19:56
— Paco Avila 2005/06/09 09:20
¿Cómo instalar J2SE Runtime Environment (JRE) a partir del fichero .bin?
RPM
no funciona
$ sudo apt-get install java-package
$ sudo chmod a+x jre-1_5_0_05-linux-i586.bin
$ fakeroot make-jpkg jre-1_5_0_05-linux-i586.bin
$ sudo dpkg -i sun-j2re1.5_1.5.0+r05_i386.deb
$ sudo update-alternatives --config java
$ sudo java -version
— Claudio Guizzetti 2005/10/24 09:33
— Daniel Reyes 2006/03/19 19:49
¿Cómo instalar el Cliente de Correo Thunderbird?
$ sudo aptitude install mozilla-thunderbird
— Manuel Gomez 2005/04/15 10:40
¿Cómo instalar Download Manager (Downloader for X)?
$ sudo aptitude install d4x
¿Cómo instalar el cliente de FTP (gFTP)?
$ sudo aptitude install gftp
¿ Cómo instalar BOINC ?
Berkeley Open Infrastructure for Network Computing. Esta creacion de Berkeley, permite formar parte de la infraestructura abierta para la computacion en RED mas potente del mundo. De esta forma podras ayudar a la investigacion en los tiempos muertos de tu ordenador.
# The Boinc! engine (packages)
deb http://pkg-boinc.alioth.debian.org/ubuntu/ breezy universe
$ sudo aptitude update
$ sudo aptitude install boinc-client
$ sudo aptitude install boinc-manager
no hacer caso de los avisos del peligro de instalar paquetes no autorizados, nos podemos fiar de los chicos de berkeley. Asi que Tecleamos SI y lo instalamos.
Con esa aplicacion en castellano podras controlar el entorno de ejecucion de BOINC, conectar trabajos y pausarlos.
Hay muchos proyectos y constantemente se añaden nuevos.
pueder dar de alta una cuenta para el proyecto SETI@home, que es el mas conocido de computacion distribuida, poniendo esta URL del proyecto http://setiathome.berkeley.edu y despues cuando este fucionando puedes usar el comando:
$ top
para ver como el proyecto seti usa el 100% de tu CPU, pero solo si no la necesitas, por lo que BOINC no hace que tu sistema funcione mas lento.
top - 15:33:08 up  2:43,  2 users,  load average: 1.09, 1.23, 1.32
Tasks:  90 total,   2 running,  88 sleeping,   0 stopped,   0 zombie
Cpu(s):  2.7% us,  0.7% sy, 96.7% ni,  0.0% id,  0.0% wa,  0.0% hi,  0.0% si
Mem:   1035712k total,  1018116k used,    17596k free,    52604k buffers
Swap:   514072k total,    12532k used,   501540k free,   629916k cached

  PID USER      PR  NI  VIRT  RES  SHR S %CPU %MEM    TIME+  COMMAND
11058 boinc     34  19 49652  29m 2500 S 96.2  2.9  27:45.91 setiathome-5.12 <--------<<
 7901 root      15   0  175m  34m 6296 S  1.7  3.4   5:33.51 Xorg
 11520 usuario   15   0 32176  12m 8464 R  0.7  1.3   0:00.87 gnome-terminal
    1 root      16   0  1560  524  456 S  0.0  0.1   0:00.98 init
Visita
BOINC para ver los proyectos en funcionamiento, SETI, Investigacion Cancer, Ciencia... seguro que te apetece ayudar en alguno. Tambien existe esta otra pagina en español donde puedes informarte y preguntar dudas:
CanalBOINC
— RafaFamiliar 2006/05/21 04:54
¿Cómo instalar Google Earth?
Primero, descargar GoogleEarth de esta página: http://earth.google.com/download-earth.html
Asignar permisos de ejecución al archivo descargado:
$ chmod u+x GoogleEarthLinux.bin
Ejecutar GoogleEarthLinux.bin, con esto inicia la instalación.
$ ./GoogleEarthLinux.bin
Seguir los pasos del instalador, las únicas opciones son sobre la carpeta en donde se descomprimirá la aplicación.
Para ejecutar GoogleEarth:
— José Jorge Enríquez R. 2006/06/17 21:55